A few thoughts on Palm Sunday… What if Jesus had made the people stop praising him? This piece delves into that eventuality.
If this post does well here, I will post more of my devotions and videos here as well.
Thoughts on Palm Sunday (Luke 19:37-40, TPT)
As soon as he got to the bottom of the Mount of Olives, the crowd of his followers shouted with a loud outburst of ecstatic joy over all the mighty wonders of power they had witnessed. They shouted over and over, “Highest praises to God for the one who comes as King in the name of the Lord! Heaven’s peace and glory from the highest realm now comes to us!” Some Jewish religious leaders who stood off from the procession said to Jesus, “Teacher, order your followers at once to stop saying these things!” Jesus responded, “Listen to me. If my followers were silenced, the very stones would break forth with praises!”
Lord, As we look at Palm Sunday again this year, I ask that you would highlight something in this passage for us. Let us see something in this familiar narrative that we might have missed in the past. Thank you, Lord. Come and embody the text for us, Holy Spirit. Amen.
As the people hailed him publically, as king and Messiah, the powers-that-were got nervous. They were, on one hand, scared of what the Romans would do if the people really tried to make Jesus a literal, political king. They didn’t want to see another insurrection and a violent smack down from Rome. On the other, they were scared that they were losing power over the people who had had their leadership inflicted on them for generations. So as the Hosanna’s were happening, they told Jesus to shut the crowd up. They didn’t want blood in the streets, nor did they want to see Jesus supplant them, as they hated him for standing up to them, anyway. So what was the deal with his response? Was he being literal, or just figuratively saying that there would be no way for him to shut them up? I think he was being literal, because as the Son of God, in that moment, if humans ceased praising him, the earth itself would have cried out in some literal, audible way. I know that literal interpretations are not “sophisticated”, but these people were not sophisitcated, for the most part. Not saying that metaphors would have been wasted on them, but the blunt and literal is hard to escape, in terms of meaning, right? So, let’s imagine if the crowd would have been silenced… first, there would have been a stillness, then a clattering, as the vibrations of praise died away… it would have been, at first, a clattering, but then the stones’ actual voices would’ve been amplified in some way so that all the humans could’ve heard them praising Jesus. All would have heard the very rocks lifting up their voices to proclaim the King of Kings. However, that was not the purpose of Palm Sunday. Palm Sunday was about the People recognizing him, even over the objections of the powers that masqueraded as their leaders. The People were done with Rome. They wanted freedom, and would follow anyone that they percieved to be genuine in desiring and might be able to lead them to that goal. High taxes, oppressive military occupation with ancient enemies in the garrisons throughout Judea and the surrounding areas, and just being ruled by people who do not believe in YHWH… this was all too much, and formed a powder keg that would only take a spark to set off. Jesus never personally made those signals, even though he was very cognizant of fulfilling Prophesy regarding Messiah, but He was not about earthly politics or religion. He came to teach us how to reconnect with God, to commune with God… to tabernacle with God, if you will. But I digress… the stones would have been audible in the worship that they already were giving to God for Jesus. They do have voices. They are alive. Most of us cannot hear because we have been conditioned and taught that they do not and are not, respectively. We are programmed to believe that rocks are inanimate. They are not.
Click Data & Privacy > Manage your Data and Privacy > Get a Copy of Your Data > Get Started
Click Select All at the bottom of the page
Verify your ID with Apple, then they will sort and compile it all for you, once it is done, they will let you know, and you’ll have access for 2 weeks to download that archive.
2) After you are able to download that data, do the following to delete everything else from your account, then disable, and/or delete the account, once you are totally Free from Apple otherwise.
Similarly to getting a copy of your data, the simplest way to delete it all (after you get the copy downloaded) is to Click Data & Privacy > Manage your Data and Privacy > Delete Your Account > Get Started
Review the information regarding the deletion of your account.
Apple will verify any deletion requests and says the process could take up to seven days to complete.
Follow Apple’s recommended steps (back up your data, sign out of devices, etc.) before you delete your account.
Choose a reason for deleting your account using the pull-down menu.
Click Continue.
Review the information regarding the deletion of your account (again).
Click Continue.
Review the Deletion Terms & Conditions and check the box to confirm you’ve read and agree with the conditions.
Click Continue.
Choose a contact method that will be used to get account status updates.
Click Continue.
Write down or print out your unique access code.
This will be used to verify your identity if you need to contact Apple Support.
This code can also be used to cancel the account deletion process.
Enter the access code to confirm you’ve actually written it down.
Click Continue.
Click Delete account to delete your account and associated data.
Apple will start the verification process before deleting your account.
Your account will remain active during this period.
It could take up to seven days for the verification process to complete.
I know this is overwhelming for many, and serves as a deterrent for those who do feel that way. I want to help you to comprehend the lingo so that you can grasp the building blocks, then feel better about embracing Linux.
First things first, what is Linux or GNU/Linux?
Linus Torvalds
It is the kernel (foundation) on top of which all of the various distributions are built on. It has been in continuous development since 1991. The original, and still primary developer and maintainer is a Norwegian-American computer scientist named Linus Torvalds. It is licensed as free & open software through the GPL, which is the GNU Product License. Incidentally, GNU stands for GNU is NOT Unix. The GPL governs how individuals can use, audit, or modify (fork) the source code of any piece of software under that license.
2) What is FOSS?
An acronym for Free and Open Source Software. Most of this software falls under the auspices of GPL. It means that the source code is open to be viewed, tweaked, forked, or audited by the public, and is usually provided free of charge from the developer(s). This process keeps innovation flowing and helps to make sure there are fewer bugs and security flaws/back doors built into given software, and that whatever bugs are found can possibly be dealt with more quickly.
3) What is a developer (often shortened to “dev”)?
A person who writes code for a program, troubleshoots it, and whether on their own or not, releases that code or program to the public in some way, whether open source or not.
4) What is source code?
It is the DNA that programs and apps are built from.
5) What is a fork?
A fork is a variation of a piece of open source software. Here is what often happens: one developer writes some code or compiles it into a program and chooses to make it open source, then another comes along and decides that he wants something done differently, or wants to add a new feature to what was already written and published, and a fork is born.
6) What is a bug?
A coding error that leads to an undesired result in a program or application.
7) What is a Distribution (distro), anyway?
A certain set of packages bundled together with some sort of user interface to form what we see and use as Linux. There are probably 1000s of them, around the world, some more like Swiss army knives, with something for everyone, where others are more like precision lasers, only beneficial for the most specific use cases. Some are better supported than others, and some only have a single developer behind them. A Swiss army knife distro would be Ubuntu or Mint or Manjaro on the Arch side of the family tree, where the precision laser would be more like Kali or Tails or QubesOS.
8) What is a Desktop Environment?
It is a set of programs and applications that work with your display server (x11 or Wayland, for the most part) to produce a Graphical User Interface (GUI) for you to navigate with your mouse and/or keyboard shortcuts. Some examples are Gnome, XFCE, MATE, Cinnamon. KDE Plasma, and LXDE (soon to be abandoned for LXQT). Each one has its quirks, benefits, and drawbacks. Gnome is largely a one-size-fits-all proposition, and is growing less and less customizable as time and versions go by. XFCE, MATE, and Cinnamon are all forks, or variations on an older version of Gnome that someone wanted to save and do their own thing with. KDE Plasma is modular by nature, and can be themed in just about any way imaginable. LXDE is meant to be lightweight and is themeable, as far as I know, but that is about it.
9) What is a Window Manager?
These are alternatives to Desktop Environments. Usually, they use fewer system resources to provide a GUI for you to interact with. Most of them are geared for developers who are more comfortable navigating through shortcuts on the keyboard rather than taking their fingers off of the keyboard to mess with a mouse. You can take the time to learn one or more, and really make your computer YOURS, and have everything EXACTLY where you want it to make your computer be as efficient as it can be for YOU. YOUR setup doesn’t need to be based on any other person’s paradigm, unless YOU choose that for yourself. Some popular examples are i3, iceWM, and Sway.
10) What is the Terminal?
It is the primary command line interface in Unix-based systems, other than TTY. It is a more powerful version (IMHO) of the Powershell in Windows, it allows you to update your whole system in a command or two (depending on if you have aliases, or which package manager your distribution uses), change settings if you know the commands, launch programs without browsing to an icon or shortcut on your system, reboot the system, just about anything, really.
11) What is TTY?
A pure command line tool that allows you to dive all of the way down to kernel level and edit whatever you please, more or less. It is Linux without a GUI. You will see it if you break your Desktop Environment, graphics drivers, or Window Manager. You can call it up at any time by pressing CTRL + ALT+ F3-F6, then return to your primary GUI by pressing CTRL + ALT+ F2, if it is functional.
12) What is a package manager?
A package manager is your portal to repositories where packages and programs are stored. It provides a centralized way to install and manage programs on your PC, rather than needing to browse near and far, hither and yon across the internet just to find programs you want to install. They are a better way than the disorganized way windows has most of us trained. Some common examples of package managers are APT/Synaptic, Pacman/Pamac, Zypper, YUM, and Pkcon. APT/Synaptic exists in Debian/Ubuntu. Pacman/Pamac are used by most Arch distros. Zypper is the manager from SUSE. YUM is from RHEL/ Fedora. Pkcon is the one for KDE Neon (which is a flavor of Ubuntu, but the developers chose to roll their own package manager for it, as APT can be awkward at times).
13) What is a repository (repo)?
A repository is a server, usually with mirrors (copies in other places) that hosts certain packages (programs and apps) for your distribution, or a program that you want to add to your computer (if you are on Debian/Ubuntu).
14) What is a server?
A server is a computer that provides something to other client computers, whether files, printers, or some other centralized resource that can be shared across a network.
15) What is a network?
A network is a group of interconnected computers that can share files, services, or other resources. There are Local Area Networks (LANs, like at your house or in the office at work), also known as intranet, are within one location or company, and Wide Area Networks (WANs), which often contain many LANs, and comprise larger elements of the internet.
16) What is a Bootable or LiveUSB?
A USB flash/ jump/ pen/ thumb drive that has had an operating system installed on it via a tool like Balena Etcher, YUMI, Rufus, or any number of others out there so that it can be launched by any attached computer. Then you can choose to install it or not after you explore a bit, as it really is running on your system, just in a static manner.
17) What does it mean to “flash” an OS?
Flashing is the process of installing a desktop OS or mobile ROM to a portable medium like a USB thumb drive, SD card, or external SSD or hard drive. This makes the drive able to boot into and install (if so desired) any compatible OS on any computer or device it is compatible with.
18) What’s an ISO file?
It is a file type defined by the International Standards Organization, specifically those around ISO protocol 9660. This standard allows whole file systems to be directly copied without any compression applied, and to produce a single file which can be used as though it were physical media. This allows the entirety of what was on a disc or discs (CD, DVD, or Blu-Ray) to be transferred to a computer as a single file. This file can then be mounted (and used as though it were the physical media), or copied to other media (another optical disc, external drive, or a thumb drive that has enough capacity). This is why whenever you download Windows, Linux, or a copy of MacOS, it comes as an ISO file.
18) What is a ROM?
It stands for Read Only Memory. For our purposes, this is what we call system images for mobile devices, mostly for Android phones. It is the Android equivalent of an ISO file for your desktop.
19) What in the world is mounting in Linux? Why do I have to Mount my USB or optical drive media before I can access it?
What is meant by mounting a drive? Before your computer can use any kind of storage device (such as a hard drive, CD-ROM, or network share), you or your operating system must make it accessible through the computer’s file system. This process is called mounting. You can only access files on mounted media.
Here’s an analogy I found on a Linux forum that may help you to grasp it better:
Let’s consider the job of the Post Master general of Washington DC.
In the early days, all roads which led to anywhere, lead from PA Avenue outwards. If you wanted to get your mail, your location had to be navigable from PA Avenue; If somebody builds a street off PA avenue, and then builds a house, he must tell me:
“My house is at this GPS location. But in order to get mail, start at PA Avenue, then go to K street, then go to my house”
mount GPS_LocationOfMyHouse to PA Avenue / K street / MyHouse
Mounting is simply the process of telling the post master general where the house is relative to PA Avenue, or in this case, the root path.
7) Flash the ISO you downloaded onto the usb flash drive
8) Unmount (Safely Remove) and detach flash drive from the computer
Another thing you may need, unless you work on small electronics on a regular basis is this: one of the iFixit screwdriver sets. I have the Mako kit right now, but I may invest in a larger kit later on. You probably only NEED the Minnow kit for this project.
On your Chromebook, here are the steps you’ll need to take:
Hold down Esc + Refresh and press the Power button (at the same time) to restart into Recovery Mode.
Press Ctrl + D, which will bring up a prompt asking if you want to enter Developer Mode. Press Enter to proceed.
The Chromebook will start initializing Developer Mode—this may take some time.
When the setup is complete, you will meet a screen that displays an exclamation mark, and the phrase “OS verification is OFF”.
From now on, you will see this screen every time you turn on your Chromebook.
If you wait 30 seconds, your Chromebook will start automatically, or you can press Ctrl + D to boot immediately.
While on this screen, if you press Ctrl + L, it will drop into legacy boot mode, allowing you to boot from the flash drive, if your machine has the right firmware installed. If not, then follow the next steps. If so, then skip down to step 8.
We may need to open the physical computer case to remove the hardware Write Protection (WP). There are two forms of WP on Chromebooks:
The screw. It will be a conspicuous screw that looks different from all of the others, once you remove it, the circuit forcing the eMMC storage to block off certain parts of the ROM from being tampered with (which is where the Firmware in the next step goes). If your Chromebook is a 2017 model or older.
To temporarily disable the CR50, remove the battery, plug in the power cord, then proceed to the next step. (This is for models newer than 2017) After Linux is installed, don’t forget to reinstall the battery and close up your case.
Boot into ChromeOS, and press Ctrl + Alt + T to bring up the terminal and type shell, if it asks for a password, it is Chronos .
Then copy the following commands and paste them into the terminal:
After this, restart the Chromebook again, and hold Ctrl + L while on the Developer Mode screen, and select which device to boot from (your flash drive or other external storage where you put the Linux ISO earlier). Then press Enter.
Linux should load from the flash drive, which will take a while.
Once booted into Linux that way, I encourage you to poke around a bit and familiarize yourself with the system.
Then, once you have done that, and assuming that there aren’t any issues, we can click on the shortcut to the installer, which should be on the desktop.
If the installation proceeds as planned, all we need to do is follow instructions in the installer to replace ChromeOS with Linux, set up your account info, and actually make the switch. The install process shouldn’t take more than 30 minutes, tops.
Once your distro is installed, it should ask you to reboot and start the computer from the eMMC storage onboard vs continuing to run from the flash drive.
Reboot. Then I will help you to install any apps you need through the software center app, then you can enjoy your newly Freed Chromebook.
Tech Freedom supports the following AOSP (Android Open Source Project) ROMs:
GrapheneOS Logo
HavocOS Logo
CalyxOS Logo
/E/ OS Logo
LineageOS Logo
Lineage for microG Logo
There are more options than just this, but this is the corner of the space that I know much of anything about.
Your options are limited by which device you choose to work with, I wish that weren’t the case, but there it is. Recent (Gen 4 and later) Pixel devices will have the best support in general, as they are the easiest to modify.
LineageOS and its variants are the most broadly compatible (if your device can be bootloader unlocked, you can probably put LineageOS on it).
One thing to keep in mind with vanilla LineageOS and HavocOS is that they do not come with microG or any other gapps implementations, so your battery life may suffer a bit due to the workaround necessary for push notifications.
Bottom line: Pixel phones are the most flexible.
Most other devices will be limited to either /e/ OS or Lineage/ Lineage for microG.
Now that you have selected your ROM, you can follow the directions below, use the associated Web Installers, or simply follow the device-specific directions supplied by your ROM’s developer(s).
Follow the directions for your device from the ROM’s developer. It will probably go something like this:
Computer side (don’t touch your phone until you do this) 1) Download ROM to computer 2) Install ADB/fastboot to computer
Arch Linux ADB/Fastboot install
Debian/ Ubuntu ADB/Fastboot install
Video for windows ADB/ Fastboot install
3) Connect data cable to computer 4) open your command line interface (powershell or terminal)
Phone side prep 1)
How to enable developer options on your phone
2)
OEM Unlock enable
3)
USB Debug Enable
4) connect to a computer 5) give debug permission to computer
Computer side (after debug permissions) 1) type adb devices, if something shows up, you’re likely good. 2) type adb reboot bootloader (this will cause the phone to reboot and look something like this)
Fastboot example
3) type fastboot devices, if your device shows up, perfect 4) type fastboot oem unlock (will have some variation, but follow what the install instructions for your device and ROM say) then grant permission on the device. 5) type fastboot boot (filename and path to the recovery file for your device, which you should’ve downloaded with the ROM zip file earlier, should be able to drag and drop the file into your commandline environment) the file should transfer and the phone should boot into the recovery for your ROM
two recovery options (LineageOS Recovery and TWRP)
Then, back on the phone, once in recovery for your ROM, follow directions, but usually they require you to format the device, and clear the dalvik cache.
After that, prepare your phone to receive a sideloaded update.
Then on the computer, type: adb sideload <filename.zip>
(or drag and drop the file into your command line or terminal after you type adb sideload .
and wait, it may not reach 100%… most of the time, it only claims to get to 47%, but the image is flashed, so from there, you tell it to reboot the system (phone), and wait.
Your first boot will likely take 5-20 minutes, depending on your device.
And viola, you have a degoogled phone.
Most of this can be skipped if you choose to go with GrapheneOS, or CalyxOS which have web based installers. All you need to do there, is the initial prep (unlocking and allowing debug permissions for the computer).
By the time you finish this quick article, you will be well on your way to breaking free from Google’s spyware on your phone wintout needing to fool around with the bootloader. Tech Freedom is well aware that our economy is in shambles, so I am sensitive to that reality. Let’s stick it to Google by limiting their data gathering abilities by ceasing to use Gmail, google search, Chrome, calendar, and the Play Store as much as possible. This quick article will give you the tools to avoid the Play Store and keep track of trackers connected with apps you have installed.
Grab the apk file for f-droid to get access to more FOSS options for your phone. Even prior to degoogling, this will help you to get away from standard tracking-laden apps, including the aurora store, which is a play store alternative that allows you to spoof a google account so anything you install through that facility isn’t automatically tied to any account you own (making it harder for google and the NSA to track your app usage).
Once you’ve done all of that, proceed to download the Aurora store to replace the play store while you prepare to your device itself.
Follow the instructions here to download an archive of all of your account data, and once you have done that, you can delete that data from their servers and set it so that they can’t (in theory) gather so much, moving forward, by following these instructions. After you set up a new, non-big tech email account, whether with Zoho, Protonmail, Startmail, or whatever other provider you choose, and switch all of your important online accounts over to the new address (banking, social media, whatever other cloud services or newsletters you want to continue receiving, etc), you can (and should) delete your Google account by following these steps.
As we begin the journey toward tech freedom with our computers, it is important to take things one step at a time.
Jesus saves and so do we
1) First things first, back up all of your files (docs, music, pictures, videos, etc) to some external media (flash drive, network storage, external hard drive/ssd).
2) Then, research about distributions (distros) and display environments (DE)/ window managers (WM) to see which ones strike you as workable for you, Linux is all about variety and making your computer work for you.
Quick suggestions: Most distros have multiple DEs. The DE is what you really interact with, and many can look either very similar to either windows or MacOS by default. Some are more easily customized than others, and some may overwhelm you with that (here’s looking at you, KDE), and others are becoming less and less tweakable (hey there, GNOME). Others are forks of one of these two (Cinnamon and Pantheon are both forks of GNOME that go in opposite directions).
There are 4 main families of distros: Debian/Ubuntu based (Mint, any spin of Ubuntu, Pop!OS, DraugerOS, Elementary, ZorinOS, etc), Arch (Manjaro, Vanilla Arch, Garuda, etc), RHEL (Red Hat, Fedora, Silver blue), and SUSE (OpenSUSE [desktop], and enterprise). There are others, many, many others. Don’t get overwhelmed. Talk to me, my brother, Lone Ranger, or Dale Gribble for help sorting it all out.
3) take your pick, or maybe 2 or 3, and download them to your computer.
4) Then download
Balena Etcher
insert a blank >8 GB flash drive or SD card, and install or open the program you selected, and flash the distro and DE of your choice.
5) reboot your machine.
5a) in win 10+, hold the shift key as you click reboot, to bring up the system restore menu, then click “Boot from device” and select the media you just flashed and hit OK.
5a1) if in an older version of windows, reboot and enter either the boot selection menu (ESC or F1, usually, as it initially powers back on) or the bios setup utility (F8-F12, depending on the system manufacturer). And go to boot options, then select the first option and change it to boot from USB. Save & exit. Reboot.
5b) if on Mac, reboot, then as it power cycles, hold the option key and select your USB (will have the USB logo on it, and should be orange)
6) Boot with proprietary drivers, just in case
7) explore the live environment to see if it is good for you. The live environment will give you a pretty clear picture if your hardware will work out of the box, and whether your combination of DE/WM and Distro will work for you.
8) if it isn’t, reboot, unplug the flash drive, and go back to Windows, as you haven’t made any changes to your system yet, then repeat steps 4-7 until you are happy with what you see in the live environment, then
9) double click install or run installer on the desktop.
9a) if you don’t have any apps or programs on windows that won’t work in Linux, or can’t be replaced with FOSS, then you’re likely to need to dual boot. I will post a separate guide on that later.
9b) if that is not the case, then you can just install it over the top of windows and wipe that sucker out. 😉
Once it finishes, you will be prompted to restart the computer, and as it shuts down, it should tell you to remove the flash drive, so that it can boot from your hard drive/ SSD. If it boots, this leg of your journey is a success.
When this is complete, your computer will have tech freedom, but what about your mobile device(s) and the rest of your digital life?
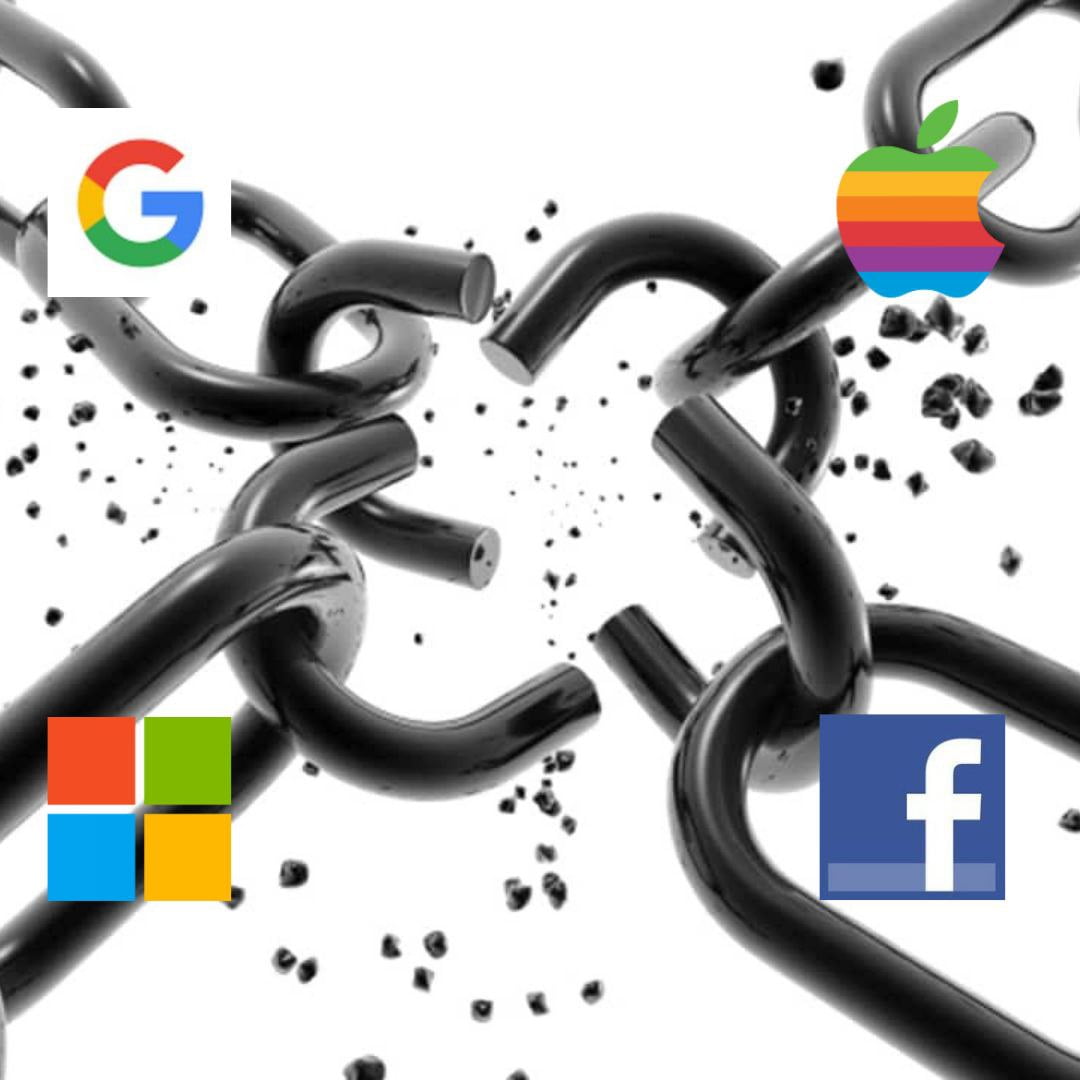
So, last time I mentioned that is is actually easy to do this. This time, I’ll be making the case as to why you should do it. Tech freedom (the concept, not the company) is the cornerstone of personal freedom, moving forward. Why do I say that? Look at the power to silence people Big Tech has… Twitter and Facebook can delete and disable your account, even to the point of blocking you from creating another account, but that is only the most extreme thing… the more insidious thing is that they operate algorithms to sort what they believe you should see and know. I’m sure that you have heard about Donald Trump and many of his supporters being de-platformed on Twitter and Facebook services in early 2021. This could happen to you, if you persist in speaking something contrary to the accepted narrative.
What else can they do? Well, the reality is that they, along with Google, see YOU as the product… YOURprivate data and personal attention are the primary commodities that they trade. How does that strike you? Are you ok with constant surveillance just to use a “free” service? Each “free” account connected to the Internet of Things (IoT) is constantly using those devices to track your movements, conversations (they claim that they don’t record these, but how do we KNOW?), and internet activities. Is this what you signed up for? Well, technically, yes, you did, when you agreed to the End User License Agreement (EULA… that thing that everyone agrees to, but almost no one ever reads) upon account creation. That goes for Facebook, Twitter, Google (Gmail, Docs, Calendar, Youtube, Nest “smart” thermostats, and Search are all tied to this), and Amazon (Fire tablets, mobile apps, Prime membership, Alexa, Dot & Echo).
That’s only the web sites and services that we all use to some extent, set to spy on us from the get-go. We want to trust our devices, right? We want to believe that Android, iOS, iPadOS, MacOS, and Windows are all benign, right? You can probably guess that I am about to give a resounding, “No!” Aren’t you? Well, that is the theme, isn’t it? Big Tech = EVIL. Not saying that ALL tech is evil, not in the least, but the alternatives to these platforms, services, and Operating Systems are something that we ALL should look into at the least. What about these OSes? They all have elements that track you, and or keep you tied into what they approve of in terms of applications. Apple’s offerings are the most obtrusive and closed-off of the bunch, but as I said ALL of them have elements that “phone home” so to speak, and report on usage, possible errors or crashes encountered, and who knows what else; this is called “Telemetry” and they all claim that it is essentially anonymous, but again, how do we know, with their closed-systems? I could go on and on, but don’t want to completely bore you to tears. If this has you clutching your pearls and you can’t handle the thought of figuring this all out yourself, check out my Freedom Consultation.


 right now, but I may invest in a larger kit later on. You probably only NEED the Minnow kit
  for this project.


 as you click reboot, to bring up the system restore menu, then click “Boot from device”
  and select the media you just flashed and hit OK.