Tech Freedom supports the following AOSP (Android Open Source Project) ROMs:
 GrapheneOS Logo
  HavocOS Logo
  CalyxOS Logo
  /E/ OS Logo
  LineageOS Logo
  Lineage for microG Logo
There are more options than just this, but this is the corner of the space that I know much of anything about.
Your options are limited by which device you choose to work with, I wish that weren’t the case, but there it is. Recent (Gen 4 and later) Pixel devices will have the best support in general, as they are the easiest to modify.
LineageOS and its variants are the most broadly compatible (if your device can be bootloader unlocked, you can probably put LineageOS on it).
One thing to keep in mind with vanilla LineageOS and HavocOS is that they do not come with microG or any other gapps implementations, so your battery life may suffer a bit due to the workaround necessary for push notifications.
Bottom line: Pixel phones are the most flexible.
Most other devices will be limited to either /e/ OS or Lineage/ Lineage for microG.
Now that you have selected your ROM, you can follow the directions below, use the associated Web Installers, or simply follow the device-specific directions supplied by your ROM’s developer(s).
Follow the directions for your device from the ROM’s developer. It will probably go something like this:
Computer side (don’t touch your phone until you do this)
1) Download ROM to computer
2) Install ADB/fastboot to computer
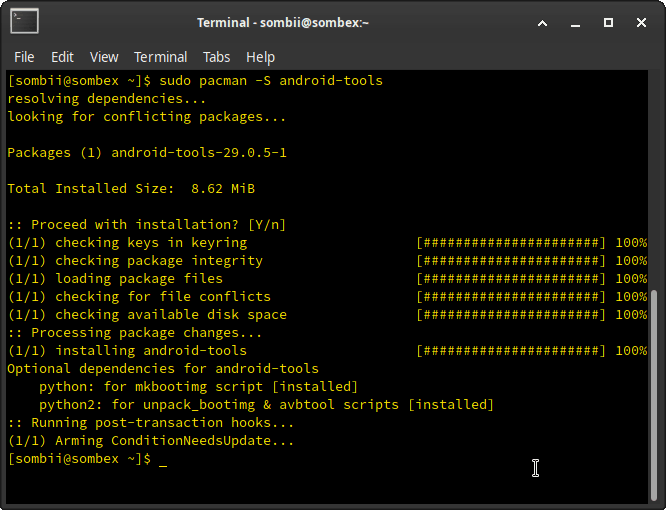 Arch Linux ADB/Fastboot install
 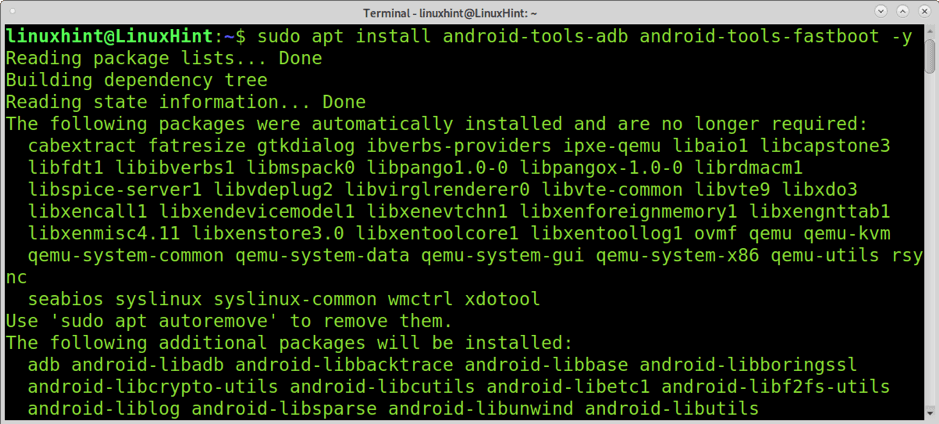 Debian/ Ubuntu ADB/Fastboot install
Video for windows ADB/ Fastboot install
3) Connect data cable to computer
4) open your command line interface (powershell or terminal)
Phone side prep
1)
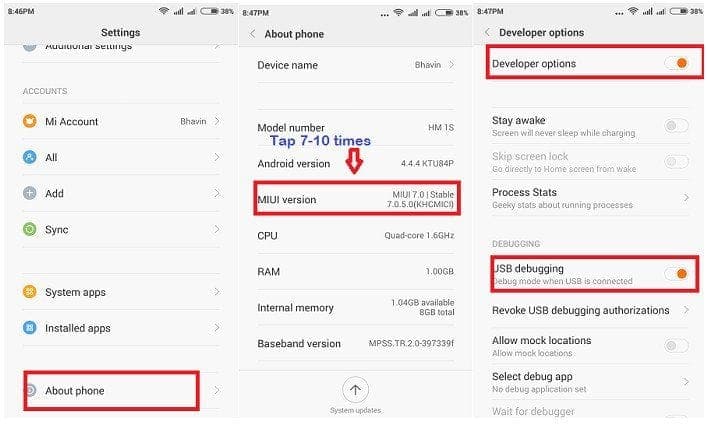 How to enable developer options on your phone
2)
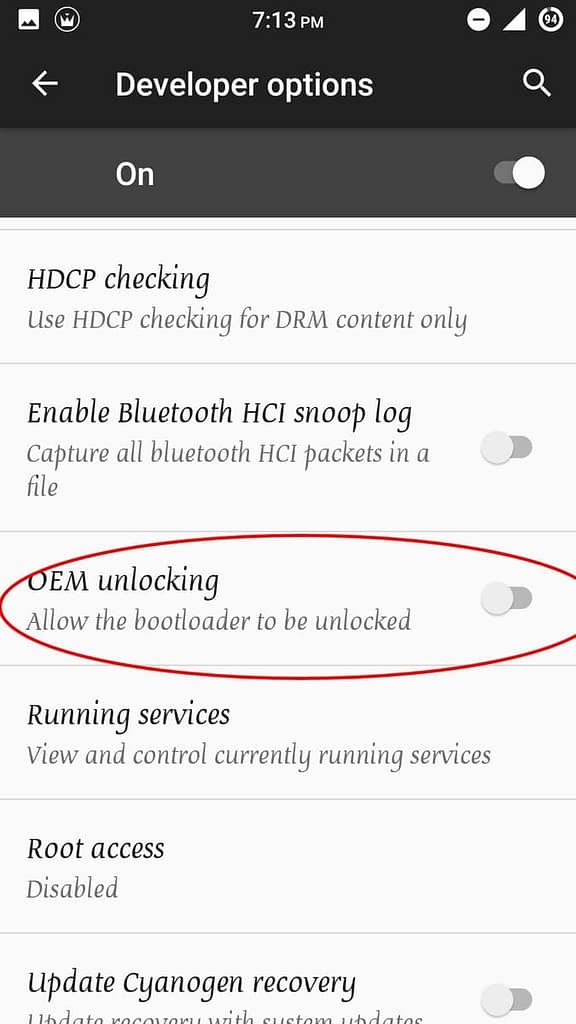 OEM Unlock enable
3)
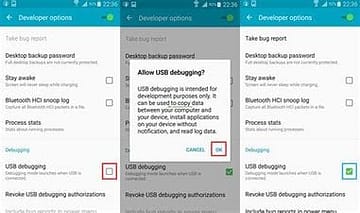 USB Debug Enable
4) connect to a computer
5) give debug permission to computer
Computer side (after debug permissions)
1) type adb devices, if something shows up, you’re likely good. 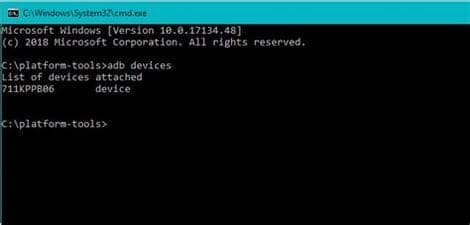
2) type adb reboot bootloader (this will cause the phone to reboot and look something like this)
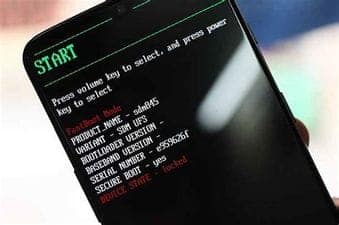 Fastboot example
3) type fastboot devices, if your device shows up, perfect
4) type fastboot oem unlock (will have some variation, but follow what the install instructions for your device and ROM say) then grant permission on the device.
5) type fastboot boot (filename and path to the recovery file for your device, which you should’ve downloaded with the ROM zip file earlier, should be able to drag and drop the file into your commandline environment) the file should transfer and the phone should boot into the recovery for your ROM
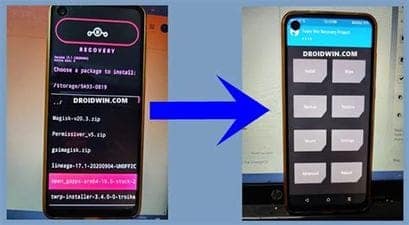 two recovery options (LineageOS Recovery and TWRP)
Then, back on the phone, once in recovery for your ROM, follow directions, but usually they require you to format the device, and clear the dalvik cache.
After that, prepare your phone to receive a sideloaded update. 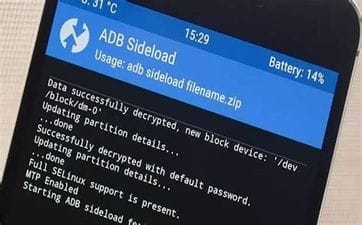
Then on the computer, type:
adb sideload <filename.zip>
(or drag and drop the file into your command line or terminal after you type adb sideload .
and wait, it may not reach 100%… most of the time, it only claims to get to 47%, but the image is flashed, so from there, you tell it to reboot the system (phone), and wait.
Your first boot will likely take 5-20 minutes, depending on your device.
And viola, you have a degoogled phone.
Most of this can be skipped if you choose to go with GrapheneOS, or CalyxOS which have web based installers. All you need to do there, is the initial prep (unlocking and allowing debug permissions for the computer).
